
How to Prevent and Repair Cracks in Epoxy Resin Floors: A Complete Guide for Long-Lasting Results
Epoxy resin floors are popular for their durability and attractive finish, but they can develop cracks over time. These cracks might appear as thin hairline splits or larger breaks that affect both the look and strength of your floor. Understanding why cracks happen and how to fix them helps you protect your investment.
The key to managing epoxy floor cracks is combining proper prevention during installation with quick repairs when damage occurs. Surface preparation, correct application methods, and regular maintenance all play important roles in keeping your floor crack-free. When cracks do appear, using the right repair techniques can restore your floor’s appearance and prevent the damage from spreading.
This guide walks you through everything you need to know about epoxy floor cracks. You’ll learn what causes them, which tools you need for repairs, and how to fix both small and large cracks yourself. We’ll also cover when it’s time to call in a professional and how to maintain your floor for years to come.
Understanding Cracks in Epoxy Resin Floors
Epoxy floors can develop various forms of damage that affect their appearance and function. Recognising the type of damage, understanding what causes it, and knowing how it affects your floor helps you address problems before they worsen.
Types of Epoxy Floor Damage
Hairline cracks are thin fractures that appear on the surface of your epoxy flooring. These cracks are usually less than 1mm wide and often look like spider webs or fine lines. They rarely go deep into the floor but can spread if left untreated.
Larger structural cracks extend deeper into the epoxy resin and concrete beneath. These cracks are wider than 2mm and may indicate serious problems with the floor’s foundation. You’ll notice they’re more visible and can collect dirt and moisture.
Delamination occurs when the epoxy coating separates from the concrete base. This creates hollow spots or bubbles where the epoxy flooring no longer bonds to the surface. You might hear a hollow sound when walking over these areas.
Other common types of epoxy floor damage include chips, scratches, and surface wear. These problems typically affect only the top layer of your floor and are easier to repair than cracks or delamination.
Common Causes of Cracking
Poor surface preparation leads to most epoxy floor damage. If the concrete wasn’t properly cleaned, dried, or profiled before installation, the epoxy resin won’t bond correctly. This weak bond makes your floor vulnerable to cracking.
Temperature changes cause your concrete base to expand and contract. When these movements happen, the epoxy flooring must flex with the concrete. If the epoxy is too rigid or applied too thickly, it will crack instead of flexing.
Heavy impacts from dropped tools or equipment create immediate cracks in your epoxy floors. Chemical spills can also weaken the epoxy resin over time, making it more prone to damage.
Moisture from below the concrete pushes up against your epoxy flooring. This pressure causes bubbles, delamination, and eventually cracks. Using the wrong mix ratio or applying epoxy in poor conditions also contributes to cracking.
The Impact of Cracks on Floor Integrity
Cracks allow moisture to penetrate beneath your epoxy floors. This moisture damages the concrete base and causes the epoxy flooring to lift or separate further. The problem spreads outward from the original crack.
Your floor loses its protective qualities when cracks appear. Chemicals, oils, and dirt seep through the damaged areas and stain or corrode the concrete underneath. This reduces the lifespan of your entire floor system.
Small cracks grow larger under continued use and stress. What starts as a hairline crack can become a major structural problem within months. The edges of cracks also chip more easily, creating rough surfaces that are difficult to clean.
Safety risks increase with floor damage. Uneven surfaces from lifted epoxy resin create tripping hazards. Cracks also make your floor look unprofessional and reduce your property’s value.
Essential Tools and Safety Equipment
Working with epoxy resin requires proper protection and the right equipment to achieve professional results. Having quality tools and safety gear prevents injuries and ensures your repair work creates a lasting, smooth finish.
Personal Protective Gear
Safety goggles are essential when working with epoxy resin. The material can splash during mixing or application, and contact with your eyes causes serious irritation or damage.
Chemical-resistant gloves protect your hands from epoxy compounds. Nitrile gloves work well because they resist the chemicals in epoxy whilst maintaining good grip and flexibility. You need to replace them if they tear or show signs of degradation during your work.
A respirator mask is necessary when working in enclosed spaces. Epoxy fumes can irritate your respiratory system, particularly during the mixing and curing stages. Choose a mask rated for organic vapours.
Protective clothing, including long sleeves and trousers, prevents skin contact with epoxy resin. The material is difficult to remove from skin and clothing once it begins to cure.
Preparation and Application Tools
A wire brush or grinder removes loose material and roughens the crack edges for better adhesion. Clean surfaces are critical for successful repairs.
You need a vacuum cleaner to extract all dust and debris from cracks after grinding. Even small particles prevent proper bonding between the repair material and existing floor.
Mixing containers and stirring sticks allow you to combine epoxy components thoroughly. Use disposable containers or dedicated mixing buckets that you won’t need for other purposes.
A paint roller applies epoxy smoothly across larger repaired areas. Choose rollers with appropriate nap length for your floor texture. Squeegees help spread self-levelling epoxy evenly.
Trowels and putty knives fill narrow cracks and smooth repair compounds. Metal or plastic options both work, though metal tools provide better control for detailed work.
Choosing Suitable Repair Materials
Two-part epoxy compounds are the standard choice for crack repairs. These products combine resin and hardener to create strong, durable bonds. Match the epoxy type to your existing floor coating for best results.
Crack fillers come in different viscosities. Thin, low-viscosity epoxies penetrate deep into narrow cracks, whilst thicker compounds work better for wider gaps or surface chips.
Primer improves adhesion on concrete surfaces before applying repair epoxy. Some situations don’t require primer, but it increases bond strength on porous or aged concrete.
Matching pigments help blend repairs with your existing floor colour. Many manufacturers offer colour packs specifically designed for their epoxy systems.
Preventing Cracks in Epoxy Floors

Proper installation techniques, careful attention to environmental factors, and consistent maintenance protect your epoxy resin floor from developing cracks. These prevention strategies address the root causes of damage before problems develop.
Surface Preparation Best Practices
Surface preparation determines whether your epoxy floor will last for years or crack within months. The concrete substrate must be completely clean, dry, and structurally sound before applying epoxy resin.
Test the concrete for moisture using a plastic sheet taped to the floor for 24 hours. If condensation appears underneath, the slab is too wet for epoxy application. The concrete’s pH level should be neutral, as highly alkaline surfaces prevent proper adhesion.
Grind or mechanically profile the concrete to create a rough texture. This removes any existing sealers, oils, or contaminants that block bonding. Fill all existing cracks and repair damaged areas before coating.
Apply a bonding primer designed for your specific epoxy system. The primer penetrates the concrete pores and creates a strong connection between the substrate and topcoat. Never skip this step, even if the manufacturer claims it’s optional.
Environmental and Usage Considerations
Temperature and humidity during installation affect how the epoxy cures. Apply epoxy when the temperature is between 10°C and 30°C. Cold conditions slow curing, whilst heat accelerates it and can cause bonding issues.
Allow the epoxy to cure fully before subjecting it to heavy loads. Most systems need at least 72 hours before foot traffic and seven days before vehicle traffic. Rushing this process weakens the floor’s structural integrity.
Consider the floor’s intended use when selecting your epoxy system. Heavy machinery requires thicker applications with higher compressive strength. Chemical exposure demands specialised resin formulations.
Avoid installing epoxy floors over concrete slabs with active cracks or ongoing structural movement. Address foundation issues before coating, as the epoxy will crack along with the substrate.
Routine Cleaning and Maintenance
Regular cleaning prevents debris from scratching the surface and creating weak points where cracks can start. Sweep or vacuum daily to remove dirt and grit. Use pH-neutral cleaners for mopping, as harsh chemicals degrade the epoxy resin over time.
Clean spills immediately, especially oils and solvents. These substances can penetrate the epoxy and weaken its structure. Avoid abrasive scrubbing pads that scratch the surface.
Inspect your epoxy floor monthly for early signs of damage. Small hairline cracks are easier to repair than large fractures. Look for areas where the coating is lifting or delaminating from the concrete.
Place protective mats under heavy equipment and furniture legs. This distributes weight and prevents point loads that stress the epoxy. Reapply a maintenance coat every few years to refresh the protective layer and seal minor surface wear.
Repair Techniques for Epoxy Floor Cracks
Fixing cracks in your epoxy floor requires different methods depending on the size and severity of the damage. Small hairline cracks need simple filling techniques, whilst larger structural issues demand more intensive repair work.
Repairing Hairline and Minor Cracks
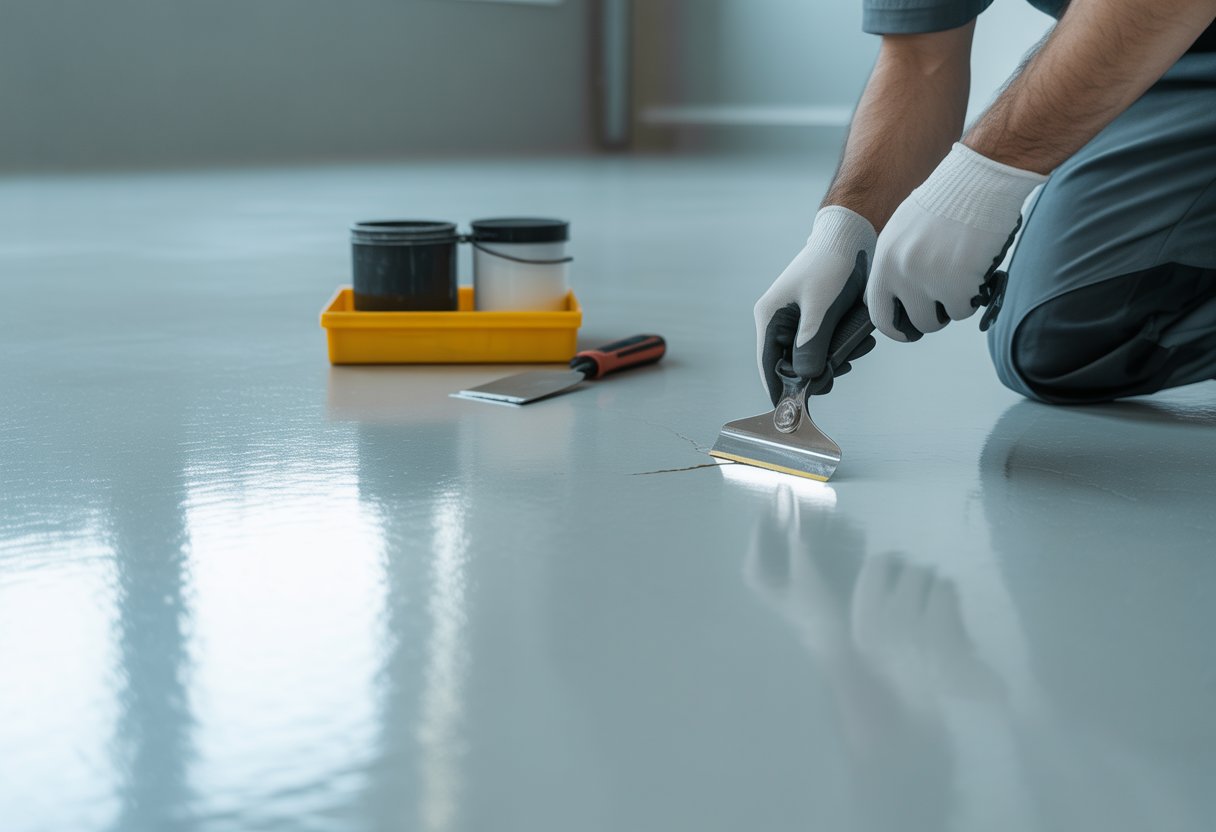
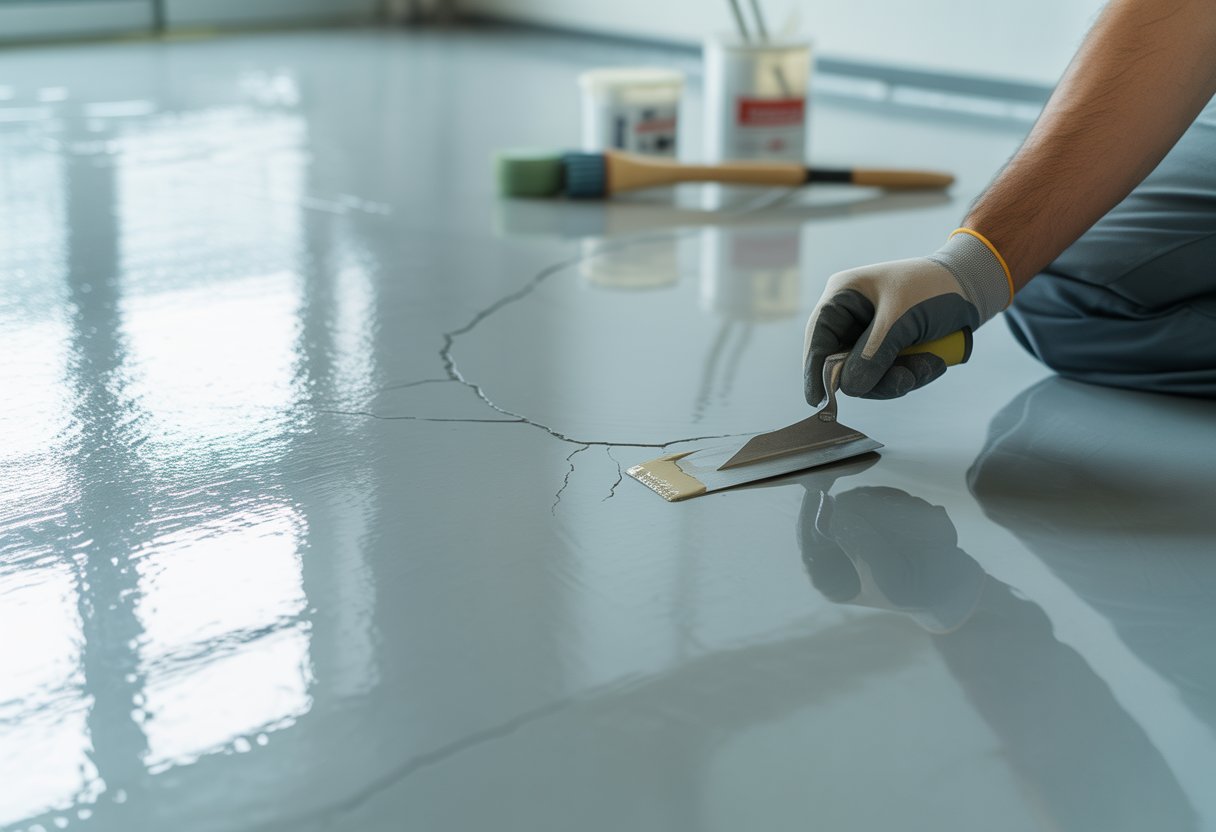
Hairline cracks are thin surface breaks that don’t penetrate deeply into your floor. You can repair these small imperfections with low-viscosity epoxy resin that flows easily into narrow openings.
Start by cleaning the crack thoroughly with a wire brush to remove any dust or debris. Use a vacuum to extract loose particles from inside the crack. Apply painter’s tape along both sides of the crack to keep your repair neat and contained.
Mix a small amount of epoxy resin according to the manufacturer’s instructions. Pour the mixture slowly into the crack, allowing it to seep down to the bottom. You may need to apply multiple thin layers if the crack is deeper than it appears.
For chips and small damaged spots, you’ll need to widen the area slightly with a grinding tool. This creates a better surface for the epoxy to grip. Fill the prepared area with thicker epoxy paste and smooth it level with the surrounding floor using a putty knife.
Addressing Delamination and Extensive Damage
Delamination occurs when your epoxy coating separates from the concrete beneath it. You’ll notice hollow sounds when tapping the floor or visible bubbling and peeling. This type of damage requires removing the affected epoxy completely.
Use a floor scraper or grinder to remove all loose epoxy from the damaged area. Cut back to solid, well-bonded material around the edges. The concrete underneath must be clean, dry, and free from any oils or contaminants.
Large cracks that extend through the concrete base need structural attention before applying new epoxy. Fill deep cracks with epoxy crack filler or concrete patching compound first. Allow this base repair to cure fully before proceeding.
Apply a bonding primer to the prepared concrete surface. This helps the new epoxy adhere properly and prevents future delamination. Once the primer dries, you can apply fresh epoxy layers to match the existing floor thickness.
Matching and Blending Repairs
Getting your repair to match the existing floor colour and texture takes careful planning. Order epoxy from the same manufacturer and product line as your original floor when possible.
Test your colour match on a small piece of cardboard before applying it to the floor. Epoxy often looks different when wet compared to its cured appearance. Mix in colour pigments gradually until you achieve the right shade.
Feather the edges of your repair area by lightly sanding the surrounding epoxy. This creates a gradual transition rather than a harsh line. Apply your repair epoxy in thin layers, extending slightly beyond the damaged area.
For textured floors, you’ll need to recreate the surface pattern. Sprinkle decorative chips or aggregate whilst the epoxy is still wet if your floor has this finish. Roll or brush the surface to match the existing texture before the epoxy begins to set.
Step-by-Step Crack Repair Process
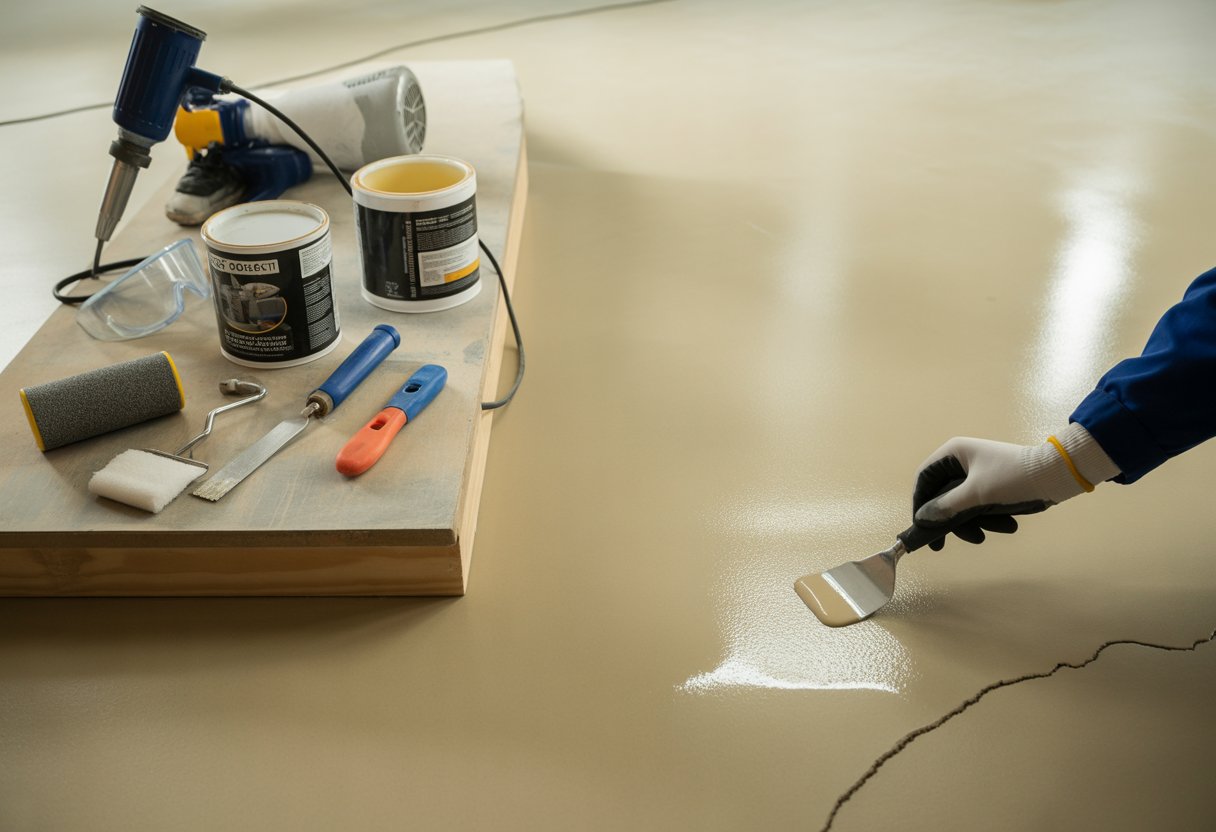
Materials needed:
- Epoxy resin repair kit
- Wire brush and vacuum
- Sandpaper or grinding tool
- Mixing containers and stir sticks
- Putty knife or squeegee
- Painter’s tape
Follow this process for crack repair on your epoxy floor:
- Clean the area – Remove all dirt, grease, and loose material from the crack
- Prepare the surface – Grind or sand around the crack to improve adhesion
- Mix the epoxy – Combine resin and hardener according to package directions
- Fill the crack – Pour or press epoxy into the damaged area
- Level the surface – Smooth the repair flush with surrounding floor
- Allow curing time – Wait 24-72 hours before using the repaired area
Temperature affects how epoxy cures and flows. Work in conditions between 15-25°C for best results. Avoid repairing cracks when humidity is very high, as moisture can interfere with proper bonding.
Sand the cured repair lightly with fine-grit paper to remove any high spots. Apply a clear topcoat over the entire floor if the repair is noticeable. This helps blend the fix and restores uniform gloss across the surface.
Long-Term Care and Professional Repair
Proper maintenance extends the life of epoxy floors, but some damage requires expert attention. Knowing when to seek professional help and implementing the right care practices will protect your investment and prevent costly replacements.
When to Consult an Expert
You should contact a professional when cracks indicate structural problems with the concrete base beneath your epoxy floor. Multiple cracks appearing across the surface often signal underlying issues that temporary repairs cannot fix.
Deep cracks that penetrate through the epoxy layer into the concrete require specialist assessment. A professional can determine whether the damage stems from foundation movement, moisture problems, or poor initial installation.
Signs you need professional epoxy floor repair include:
- Cracks wider than 3mm
- Cracks that reappear after DIY repairs
- Water seeping through damaged areas
- Large sections of delamination or peeling
- Uneven surfaces or raised edges around cracks
Professionals have access to industrial-grade repair materials and equipment that provide more durable solutions than standard DIY kits. They can also install proper joint systems when repeated cracking suggests the original floor lacks adequate expansion joints.
Extending the Lifespan of Epoxy Flooring
Regular cleaning prevents dirt and chemicals from wearing down your epoxy floor surface. Sweep or vacuum daily to remove abrasive particles that cause scratches over time.
Apply a protective topcoat every 2-3 years to maintain the floor’s resistance to wear and damage. This additional layer shields against impacts, chemicals, and UV exposure that gradually weaken epoxy.
Place protective mats in high-traffic areas and under heavy equipment to distribute weight and reduce stress on the flooring. Felt pads under furniture legs prevent scratching and indent marks.
Address small chips and cracks immediately before they expand into larger problems. Early repairs cost less and prevent moisture from reaching the concrete substrate, which causes more extensive epoxy floor damage.
Frequently Asked Questions
Epoxy resin floors crack mainly due to temperature changes, poor surface preparation, and incorrect mixing ratios. Regular inspections every six months and proper maintenance can prevent most cracking issues.
What are the primary causes of cracking in epoxy resin flooring?
Temperature fluctuations are the most common cause of cracks in epoxy floors. When the concrete underneath expands and contracts with temperature changes, the epoxy layer can develop stress cracks if it’s too rigid.
Poor surface preparation leads to adhesion problems. If you don’t properly clean and prepare the concrete base, the epoxy won’t bond correctly and can crack or lift away from the surface.
Incorrect mixing ratios create weak spots in the cured epoxy. When you don’t mix the resin and hardener in the exact proportions specified by the manufacturer, the epoxy may cure improperly and become brittle.
Applying epoxy too thinly increases the risk of cracking. Thin layers have less flexibility and are more likely to crack under stress compared to properly applied coats.
How can one effectively prepare the surface to minimise the risk of cracks forming?
Start by thoroughly cleaning the concrete surface to remove all dust, oil, grease, and debris. Any contamination will prevent proper adhesion and lead to cracking later.
Repair all existing cracks and damage in the concrete substrate before applying epoxy. Fill large cracks with epoxy filler and allow them to cure completely.
Grind or etch the concrete surface to create a rough texture. This profile helps the epoxy bond mechanically to the concrete and reduces the chance of delamination.
Check the moisture levels in your concrete slab. Excess moisture will prevent proper bonding and can cause the epoxy to bubble or crack as it tries to escape through the coating.
What steps should be taken to ensure the epoxy resin mixture has the optimal consistency to prevent cracks?
Measure your resin and hardener precisely using a digital scale rather than estimating by volume. Even small variations from the manufacturer’s specified ratio can compromise the cure and lead to cracking.
Mix the components slowly and thoroughly for at least three minutes. Scrape the sides and bottom of your mixing container to ensure all material is properly combined.
Maintain the correct temperature during mixing and application. Most epoxy systems work best between 15°C and 25°C, and temperatures outside this range can affect curing and flexibility.
Avoid adding any unauthorised thinners or additives that weren’t designed for your specific epoxy system. These can weaken the chemical structure and make the cured epoxy more prone to cracking.
Could you provide maintenance tips that extend the lifespan of epoxy flooring and prevent cracking?
Clean your epoxy floors regularly with a soft broom or dust mop to remove abrasive dirt and debris. These particles can scratch the surface and create weak points where cracks might start.
Use pH-neutral cleaning solutions rather than harsh chemicals. Acidic or alkaline cleaners can degrade the epoxy surface over time and reduce its durability.
Place protective mats under heavy furniture and equipment to distribute weight evenly. Concentrated loads can stress the epoxy and cause cracking, especially in thinner applications.
Maintain consistent indoor temperatures when possible. Sudden temperature swings put stress on the epoxy coating and the underlying concrete.
What are the proven methods for repairing minor cracks in epoxy floors without complete resurfacing?
Clean the cracked area thoroughly with a vacuum and solvent to remove all dust and debris. The repair material needs a clean surface to bond properly.
Use a rotary tool or grinder to widen the crack slightly into a V-shape. This creates more surface area for the repair epoxy to grip and makes a stronger repair.
Fill the prepared crack with a two-part epoxy filler that matches your floor colour. Apply it slightly overfilled, then sand it flush once cured.
Apply a thin seal coat of clear epoxy over the repaired area to blend it with the surrounding floor. This protects the repair and helps it match the existing finish.
Is there a recommended frequency for conducting inspections and preventative measures on epoxy resin floors?
Inspect your epoxy floors every six months for signs of wear, cracking, or damage. Early detection allows you to address small problems before they become major issues requiring full repairs.
Conduct more frequent inspections in high-traffic areas or spaces with heavy equipment. These zones experience more stress and may develop problems faster than other areas.
Check for changes after any significant temperature fluctuations or building settling. These events can stress the flooring system and create new cracks.
Schedule professional assessments every two to three years for commercial installations. Expert evaluations can identify potential problems that you might miss during routine inspections.
Need Epoxy Resin Flooring for Your Commercial Property?
Call: 0161 900 2744
Email: pashleyfloors@aol.com
Use Our Contact Form